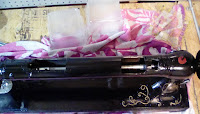
 In this part I put the upper shaft together. I have to say this was the hardest part. It might have been easier if I had been able to get the shaft out. I needed to get to the upper shaft inside my pipe. Yep I needed to cut it. with a angle grinder I cut a opening on the top near the front and back of the machine. In this picture you can see what the holes look like. I had to cut a few holes before I could reach the shaft. One of the holes had to be big enough to slip the steel bar in.
 Before you put the steel bar in every thing on the machine needs to line up. Put your needle bar assembly back in. The easiest way to do this is to have the needle bar all the way down, look at the pictures you took to do this. Then pull the needle bar assembly back up. Place your needle bar back in and tighten the needle down. Look at your pictures, you have to go to the inside of the head were the hole is and put the long set screw in. It was a pain, the screw kept wanting to fall. But I got it. Keep you needle bar in the down potion.
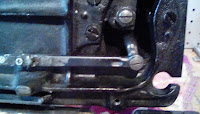
Here is were we need to line all the shafts up. Turn the machine over. I left mine in the box and used some square bowls on the back to hold the head up. The bobbin shaft needs to be all the way to the front like this.
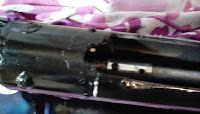 Which means the back of the bobbin shaft should be all the way to the back of the machine. Turn the machine back up. Now that everything is lined up we can put the shaft in. I used a 1/2 in steel shaft cut to 12 inches. I had to grind just a little off one end maybe a 1/8 of a inch. I needed it to go in to the 1/2 inch spacers. I got the spacers at Lowes. The steel shaft came from a hardware store. I was able to push the rear back just a little, and put both spacers on one in the front and one in the back, and the push the shaft back in place. I had to use small lock pliers to hold the bar still. Using a small drill bit and I drilled a hole in the front spacer on the shaft and the steel bar. then drilled the same holes with a 1/2 inch drill bit, I did not drill all the way to the other side, only about half way down.
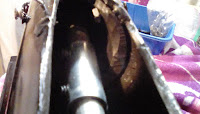 Always use safety glasses. I uses 1/2 inch socket head set screws I bought at Lowes. Screw them down and recheck to see if the bobbin shaft is still in the right place, if not put it in the right place. Now use a pair of small lock pliers and do the same to the back spacer. This is were I had to put all my parts back on to see if it worked. I did not put the motor back on. I then threaded the machine to see if she picked up thread. if not the bobbin hook will needed to be timed. There are few You Tube videos and blogs that explain this. I spent weeks trying to get mine timed up. I found that my upper shaft was just a little off. I took out one set screw and moved just a little. I had to drill a new hole and screw the set screw in. It worked and all I could do was cry. I was just so happy. This is were I drilled two holes in the front of the machine on the neck and placed two bolts and nuts to hold the head on tightly, remember I could not weld the front. I put lock tight on all the screws I had added to the machine. They were all on moving parts I did not want the screws to come out. I had to take all my parts off, except the upper arm shaft or the lower bobbin shaft.Now proceeded to sand her down, make sure to tape the top bobbin area with painters tape . I had to use a file on the welded parts first. After place paper towels in the upper holes that were cut and put cue tips in the smaller holes( like oil holes). Paint with spray primmer and let dry. Paint with spray color paint and let dry, two coats. Paint with spray clear high gloss. I have not covered my holes in my neck because I have a small wobble in my upper shaft and I want to keep a eye on it. Later I will screw a aluminum sheet over it and paint. Put all parts back on. Test again, If works put motor back on. Test it going slow. Remember, I am not a professional so if you do this I am not responsible. I had lots of set backs but I stayed with it. It took 8 months because I did not know what I was doing. Would I do it again? NO, I have it working good. Could I do it again? Yes and probably better and faster. If you make your own stretched long arm please let me know and share your thoughts and pictures. After all we can learn from each other.
...

No comments:
Post a Comment