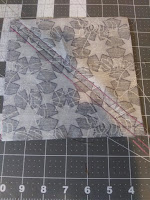
Take two, one gray, one colored 6 1/2 squares and place the front of the fabrics together, wrong sides on the out side. Mark with fabric pin one line from corner to corner. Mark a second line 1/4 inch out from first line. On the other side of the first line mark new line 1/4 inch out from first line.
You should now have 3 lines from corner to corner.
Sew the two out side lines, then cut the center line. You will now have two 6 1/2 squares triangles. Press seams to the dark color. Now make another one. We now have four 6 1/2 squares triangles.
We will need to re-square, there is a line on the square that goes from corner to corner line it up with the sewn line on the fabric that goes corner to corner. Try to make sure everything is centered, you will see it needs very little cut off, so square it any way.
Laying it out like this, we have our first named block. It is a square in a square. Pin the top two square together making sure to line up the top points. Sew from pin to pin. Making sure to remove the pins as you get to them. Press to the right or left. Sew the bottom squares the same as the top squares. Press in the other direction from the top.
The layout will look like this when you are done.
Pin the top part to the bottom part, making sure to nest your seams and match your points. Sew and press seams open. Don't forget to remove your pins as you get to them. We now have a square in a square. It is our first named block. Was it easy to under stand and make? We will be making more name blocks in the next one, I hope you will join me. Let me know what you think so far.


No comments:
Post a Comment