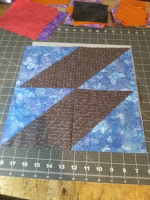
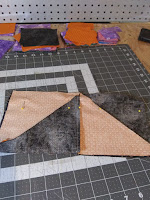
Make four 6 1/2 square triangles and arrange them like so. I do not believe this block has a name, I just like the way it looks. If any one knows if has a name let me know.
Sew the top two together, there are no points to match. Press to right or left. Sew the bottom two together, press in the opposite direction. Sew the top to the bottom, making sure to nest the seams. Press open.
So this is the way block 8 looks.
In block 9 we use four 6 1/2 square triangles, and place them like so. Now this block is called a Hour Glass Block. Sew the top two 1/2 square triangles together, making sure to line up the center point. Press right or left. Sew the bottom Two 1/2 square triangles again making sure to line up the point. Press in the opposite direction.
Nest your middle seams together, trying to match up your point. Sew and press open.
Here is a picture of the points matching up.
Your hour Glass Block is now complete.
The Pin Wheel Block, it is not one of my favorite blocks, only because I find it hard to match the points up perfect all the time. Use four 6 1/2 square triangle blocks. Lay them out like the picture.
Pin the top two 1/2 square triangles together sew. press to the right or left. Pin and sew the bottom two 1/2 square triangles together. Press in the opposite direction.
This is now what your lay out looks like.
Its time to sew the bottom to the top. This is the tricky part. start my matching up the center point you will have to fill to make sure it is right. Then pin the triangle seams together matching them up. When you have it were you want it sew. After I sew it I always look to see if its right. If not I take it out and do it again, I have taken out a few. then Press your seams open. Mine looks like a Take Shelter Here sign. Only because of the colors I used. We now have 10 blocks to use in our quilt. Have you enjoyed making your blocks so far? Share with me what you have done. The next part we will make our blocks smaller and see what we come up with. Thank you for joining me and let me know what you think.


No comments:
Post a Comment